Instructions for starting a GCE VM on Colab via GCP Marketplace
Overview
This guide is to help Colab users set up a Google Cloud Platform account and connect a GCP Marketplace virtual machine as their Colab runtime. GCP Marketplace VMs give you complete flexibility in determining your machine specs and provide you with a persistent environment that you can manage to your liking. It removes all Colab-enforced usage restrictions.
Note that Colab will not manage your VM lifecycle; you will be responsible for turning off compute instances you no longer wish to pay for. You can strategically stop/start your VM within the GCP console to manage costs to your choosing.
To start go to cloud.google.com and click on “Get Started For Free". This is a two step sign up process where you will need to provide your name, address and a credit card. The starter account is free of charge. For this step you will need to provide a Google Account ( e.g. your Gmail account) to sign in.
After completing the sign up process you will be redirected to Google Cloud Platform welcome page.
Google Cloud Creates a project for you by default which is called "My First Project". To set up a GCE VM, you can use this default project or create another one. Either way, make a note of your Project ID.
Follow these instructions to set up the billing account for this project.
If you are a billing administrator on only one Cloud Billing account, new projects you create are automatically linked to your existing Cloud Billing account. If you have multiple Cloud Billing accounts, or your Billing account is not linked by default, follow these instructions to enable billing on your project.
Visit Colab on GCP Marketplace to launch a preconfigured VM purchase flow.
Configure your VM to your liking and launch the instance. Please note that you will be billed by Google Cloud for your compute traffic. Compute Engine Pricing
If you wish to launch a GPU runtime and are having difficulties acquiring a GPU, first ensure you have enough GPU quota both globally and regionally. If difficulties persist, attempt requesting different GPUs in different regions.
Note the Zone and instance (name) for later.
The easiest way to connect Colab to your custom GCE VM is by using the link from within GCP's Deployment Manager. The link is present in the details of your Colab deployment.
If you wish to connect from within Colab, from the Connect arrow within Colab select "Connect to a Custom GCE VM"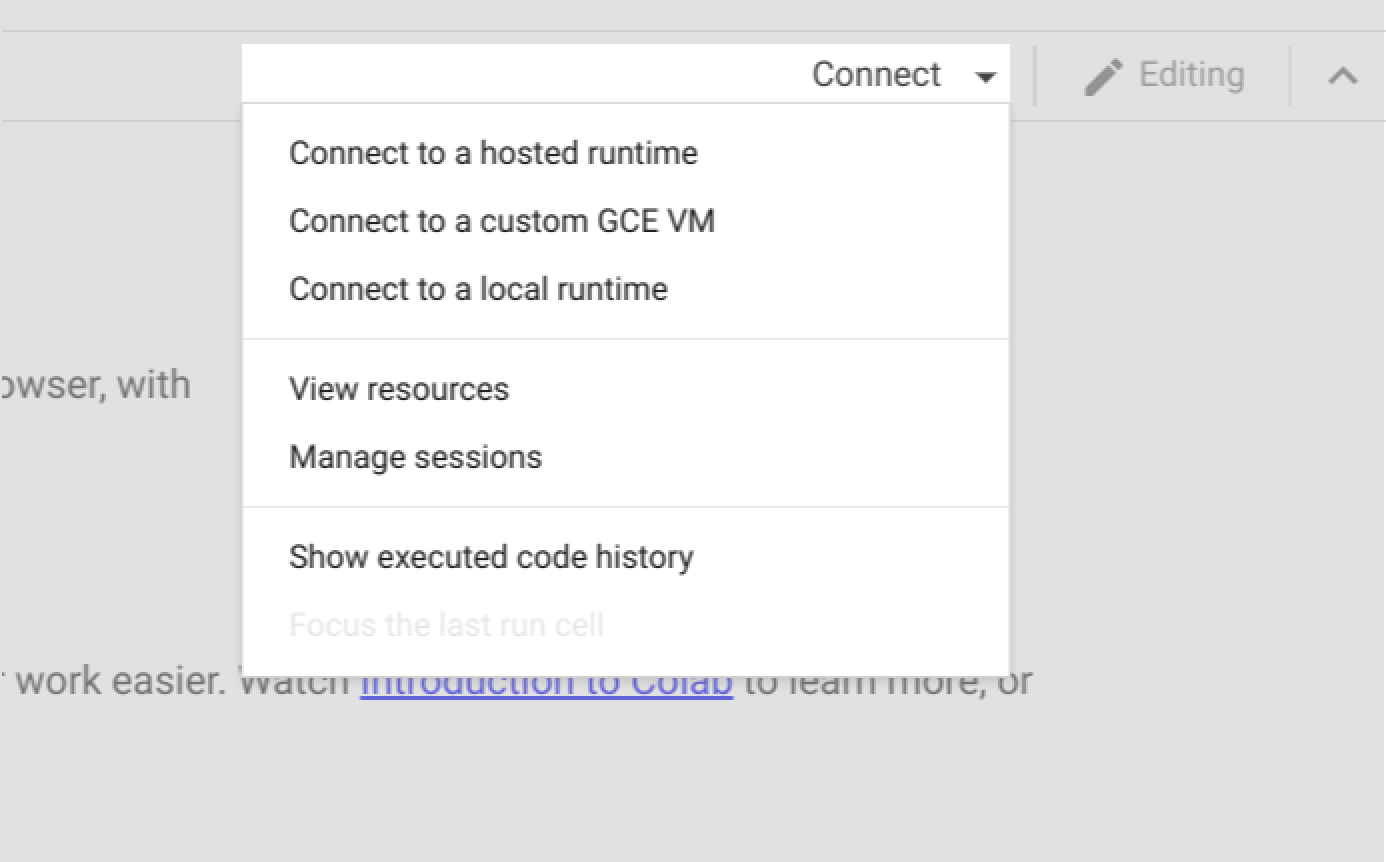
Fill in the resulting dialog with the information from your VM configuration and click Connect.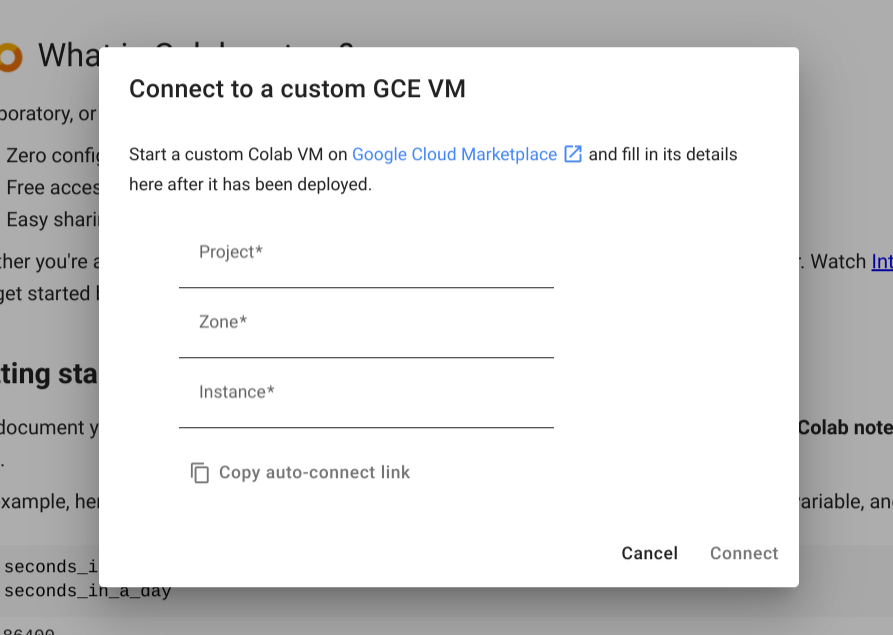
Congratulations!
You are now ready to run Colab from your GCE VM. Note that these steps only need to be run one time, but be prepared to specify your Project, Zone, and Instance to connect to your GCE VM from within Colab.
Connecting to a custom GCE VM puts you in control of your machine lifecycle. You will still experience disconnections from your VM from interruptions to your connection, but Colab will not alter the VM state: your work and progress will be saved and available when you reconnect.
If you find yourself encountering usage limitations, please first ensure your notebook is connected to your GCE VM before submitting in-product feedback.